
Publisher Menus
Publisher provides you a flexible menu system that always represents your visitors the best menu style and arrangement according to page location and user device. Seven menu locations are available in Publisher. You can create as many as menus you want and select each one of them for each location you want. Publisher menu locations are:
- Topbar Menu
- Main Navigation
- Off-Canvas Navigation
- Responsive Navigation
- Footer Menu
- AMP Sidebar
- AMP Footer Navigation
First you need to create a menu then assign it to a menu location. Every menu item in a menu has its own options for: selecting Icon & Badge, Color & Style and Responsive Options. Let’s get started with creating a new menu.
How Can I Create a Menu?
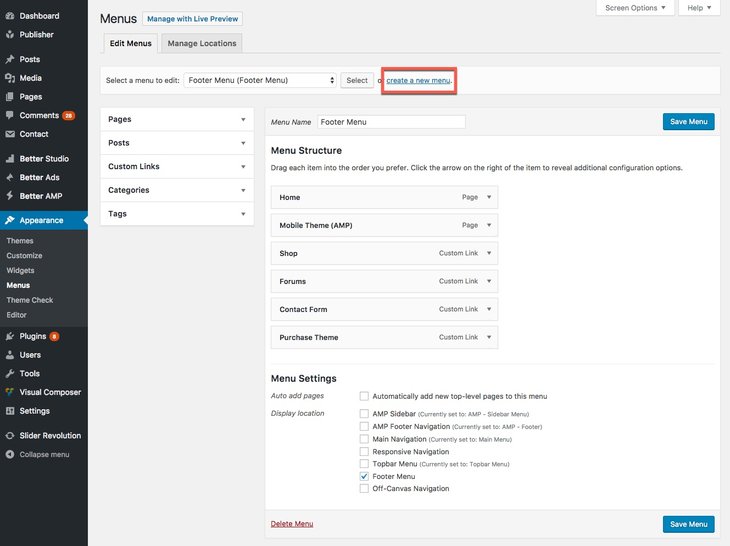
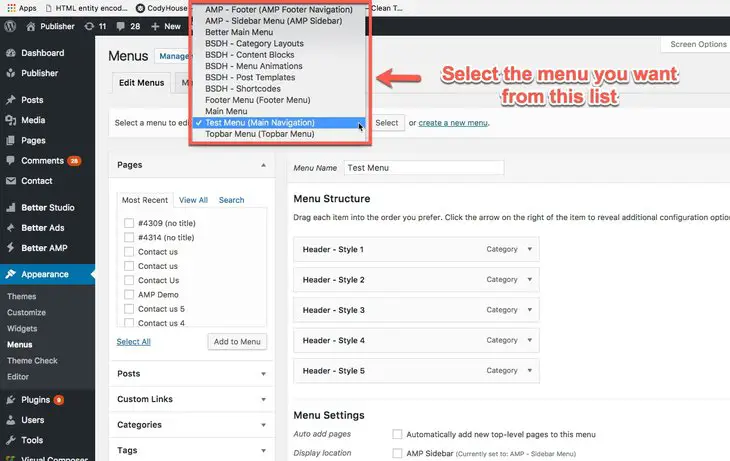
For creating a new menu go to Appearance → Menus, here you see something like below image.
1- Click on create a new menu button
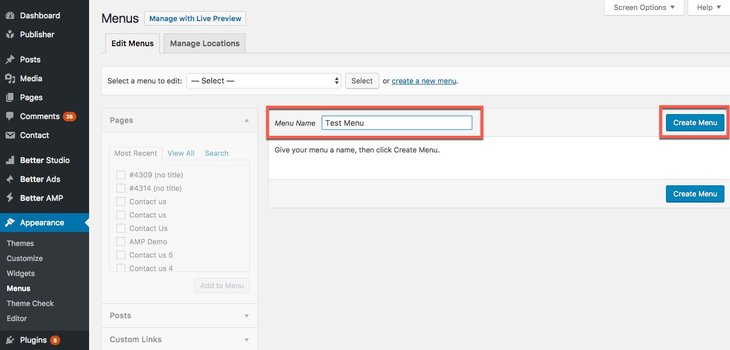
2- Write a name in Manu Name field. Click on Create Menu button. This name won’t show up anywhere for your visitors and just displaying in your Menus option panel (for now).
3- Now menu is created and you should add menu items to it. Look at below image, you see 5 tabs on left side. Select your menu items from this list.
NOTE: Plugins could add new items to this list. For example bbPress & WooCommerce.
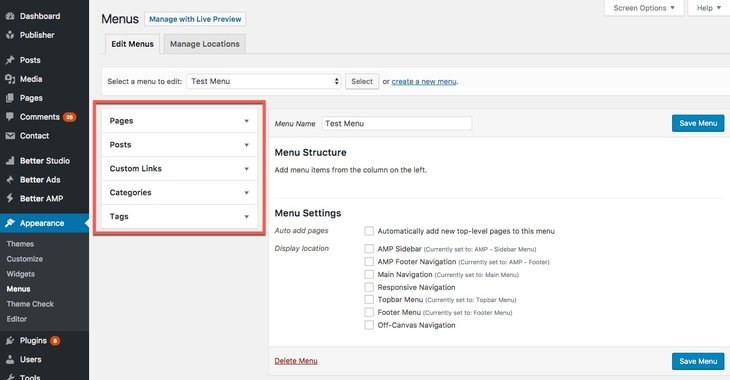
Pages: Select one of your pages for menu item.
Posts: Select one of your posts for menu item.
Custom Links: Create a custom link for your menu item.
Categories: Select one of your categories for menu item.
Tags: Select one of your tags for your menu item.
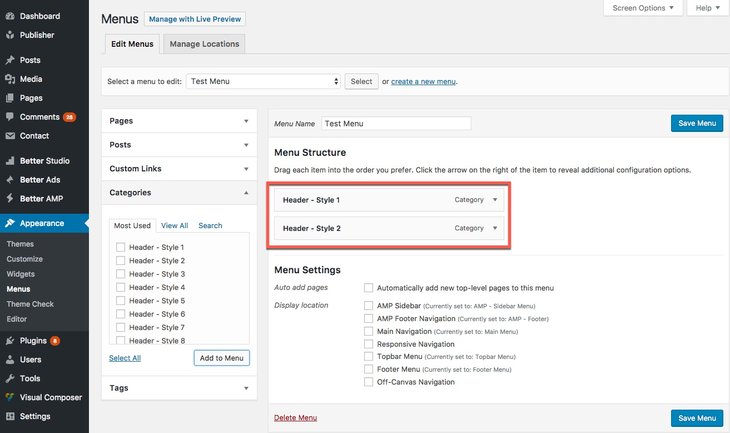
4- For example we want to add a category to our menu. Click on Categories on left side.
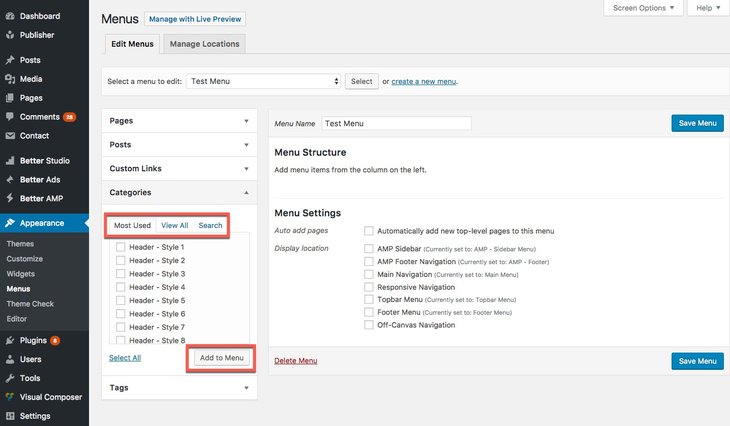
All of your categories are arranged in three different way: Most used ones, View All of them and also you can Search among them. After selecting a category click Add to Menu. If you select more than one category, all selected categories will be added as new menu items.
We select “Header – Style 1” and “Header – Style 2” then click on Add to Menu.
Now our simple menu is created. We can add new items to it, manage items location, select icon & badge for them and many other options. We will describe them in different parts in this section so keep reading!
How Can I Manage Menu Items Location and Order(sub-item)
We want to replace menu items location with each other and put some of them as sub-item of others. We use the menu created in previous part, just added new items to it.
For replacing, just drag the item you want to replace and drop it the new location.
For setting an item as sub of another menu item, drag it to the bottom of parent-item and also slightly to the right hand-side. For expelling a sub-item from a parent-item, just drag it and drop slightly to the left hand-side.
Also you can make an item sub-item of another sub-item.
Arranging menus are some kind of fun! Build its structure we have more options to come.
How to Use Icon & Badge for a Menu?
We created a simple menu, “Test Menu”, previously, now we want to select icon & badge for it but what are icon & badge? look at below image.
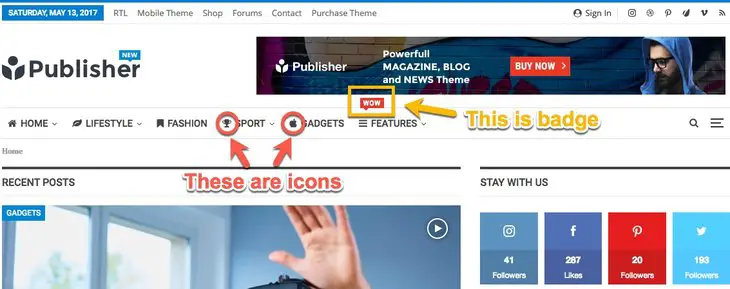
Now we know what are icon & badge for menu items, let’s see how we can change them.
1- Go to Appearance → Menus → Edit Menus, select “Test Menu” we created before or any other menu you want to change its options.
2- Now select menu item you want to change, you see Icon & Badge, click on + to open it.
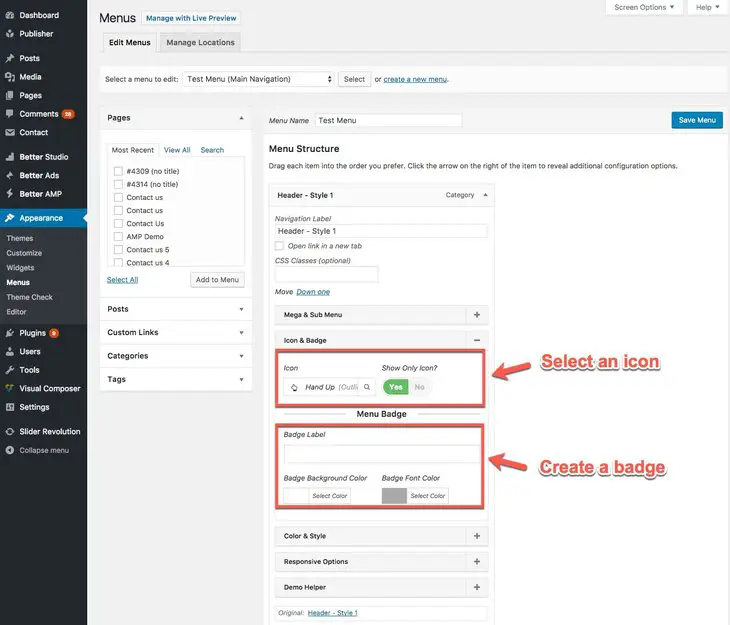
Icon: Toggle Show Only Icon? to “Yes” and select an icon for it in Icon (click on search icon).
Badge: Write a text for it in Badge Label then select background-color and font-color in Badge Background Color and Badge Font Color, respectively.
How to Change Menu Color & Style?
There are some options for changing menu styles & color. To do this:
1- Go to Appearance → Menus → Edit Menus, select “Test Menu” we created before or any other menu you want to change its options.
2- Now select menu item you want to change, you see Color & Style, click on + to open it.
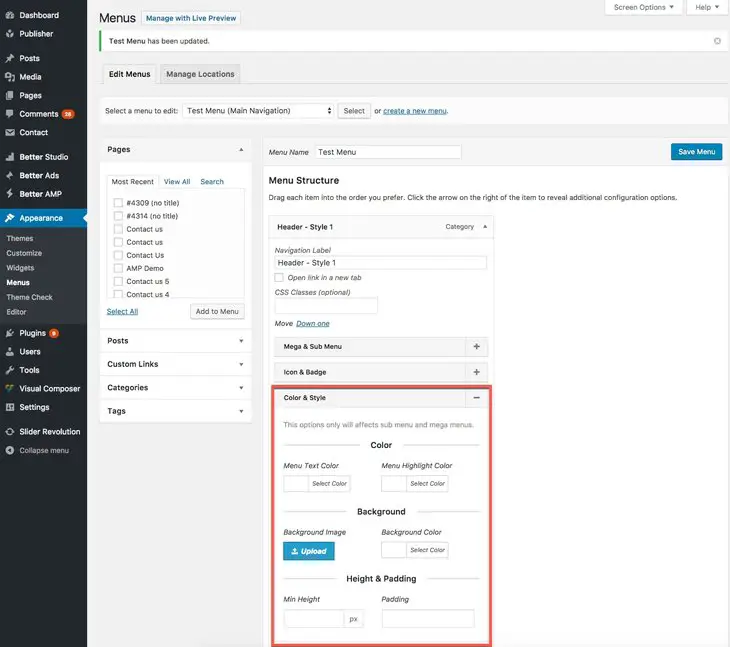
Keep in mind these changes just applies to sub menus or mega menus. Here you can change Font-Color, Highlight Color, Background Color & Image, Min-Height and also Padding of items.
Publisher Mega & Sub Menu
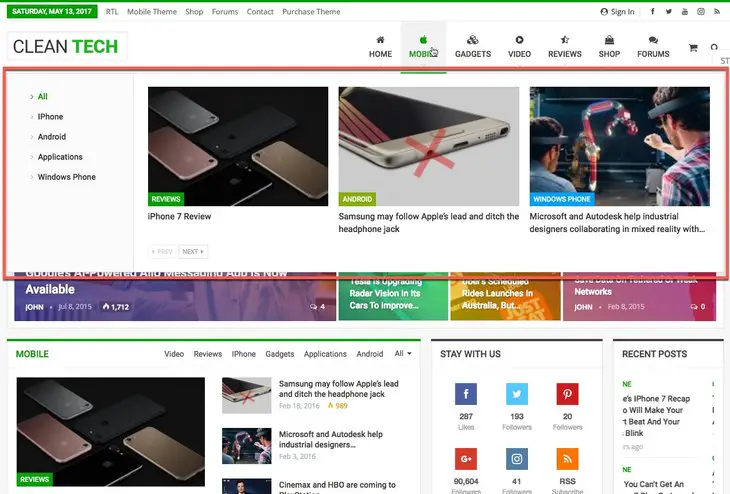
When you have sub-menus under a menu item, you can select them how to be shown in Publisher; shown as a list or as mega menu with specific styles and thumbnail. This is an example of how a Mega Menu looks like:
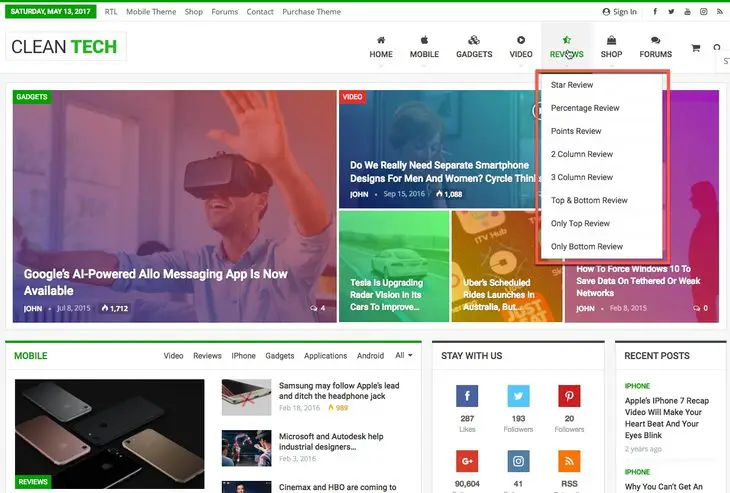
And this is just a simple listing sub-menu:
Now for customizing your sub & mega menus do as below:
Go to Appearance → Menus → Edit Menus, select “Test Menu” we created before or any other menu you want to change its options.
Now select menu item you want to change, you see Mega & Sub Menu, click on + to open it.
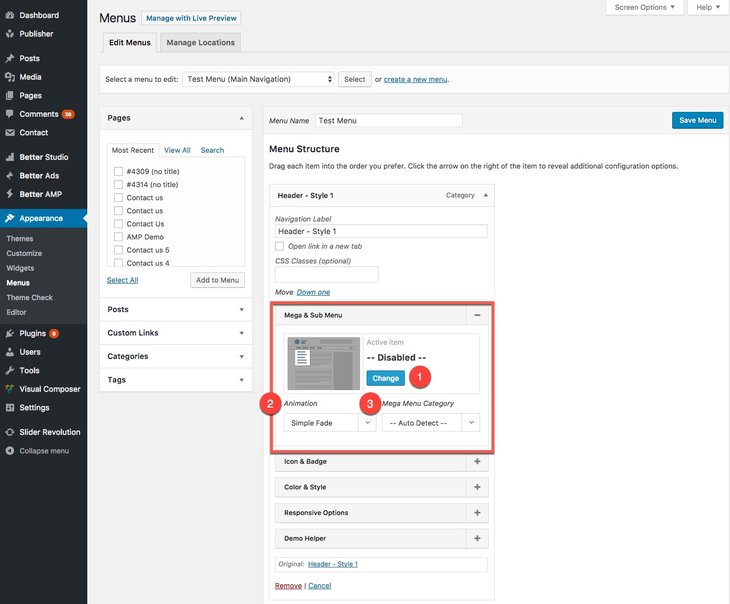
1- Active item: Here you can select a style for your sub-items. Click on Change to see a thumbnail of all available styles.
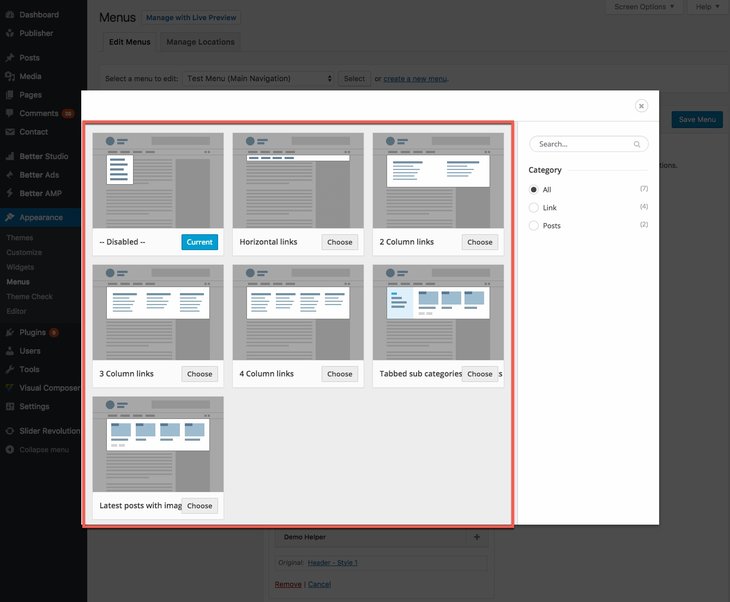
Click Choose to select the style.
2- Animation: Select an animation for the time the item is clicked.
3- Mega Menu Category: Select a category for posts that are being displayed in this list.
Responsive Options for Menu Items
It’s possible to hide a menu item on a specific device. Go to Appearance → Menus → Edit Menus, select “Test Menu” we created before or any other menu you want to change its options.
Now select menu item you want to change, you see Responsive Options, click on + to open it.
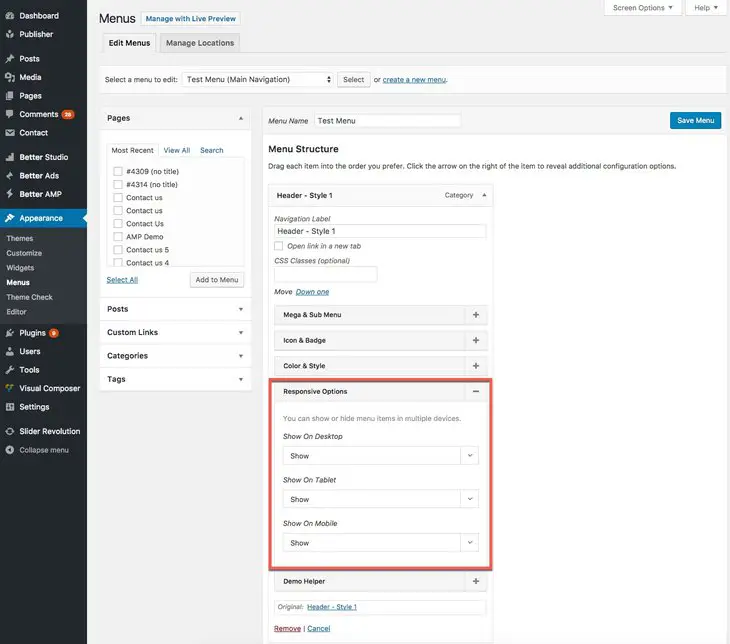
Select to show or hide the menu item on Desktop, Tablet or Mobile phones.
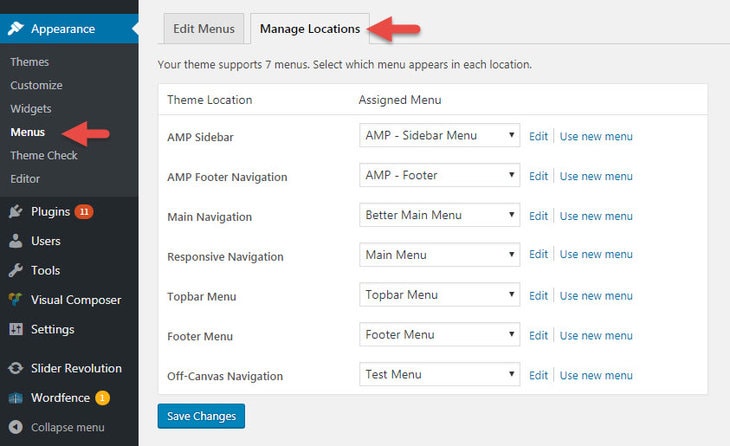
Select Menu for Menu Locations
Go to Appearance → Menus → Manage Locations, here you can select an existing menu for menu locations or create a new menu for them.
Add bbPress and WooCommerce to Menus
When you activate each of these plugins, you will see their items added to the available items for menus.
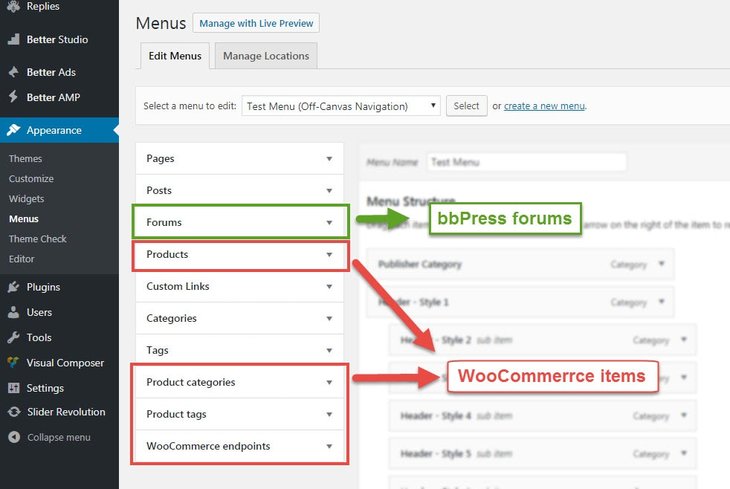
So you can add bbPress forums to menus. Also Products, Product categories, Product tags and Endpoints of WooCommerce plugin to menus. The process and settings are exactly the same as normal items.
Menu Advanced Options
To find these options go to Publisher → Theme Options → Advanced → Menu → Menu configuration
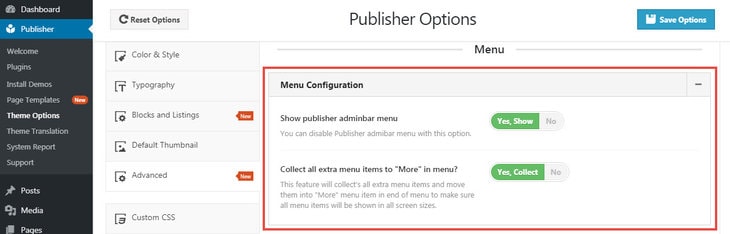
Show Publisher Adminbar Menu: Show/hide Publisher menu in WordPress adminbar.
Collect all extra menu items to “More” in menu? When your menu items are too much that exceeds menu width, Publisher smartly collects all the extra items under a new item “More”. This guarantees your menu always is tidy and remains in one row.