
In Typography you can manage fonts and their properties. In Publisher, for every page, block, widget, etc, there is a separated typography panel which gives you the ability to control: Font Family, Font Weight, Font Character Set, Text Align, Text Transform, Font Size, Letter Spacing, Font Color.
In theme panel go to Publisher → Theme Options → Typography:
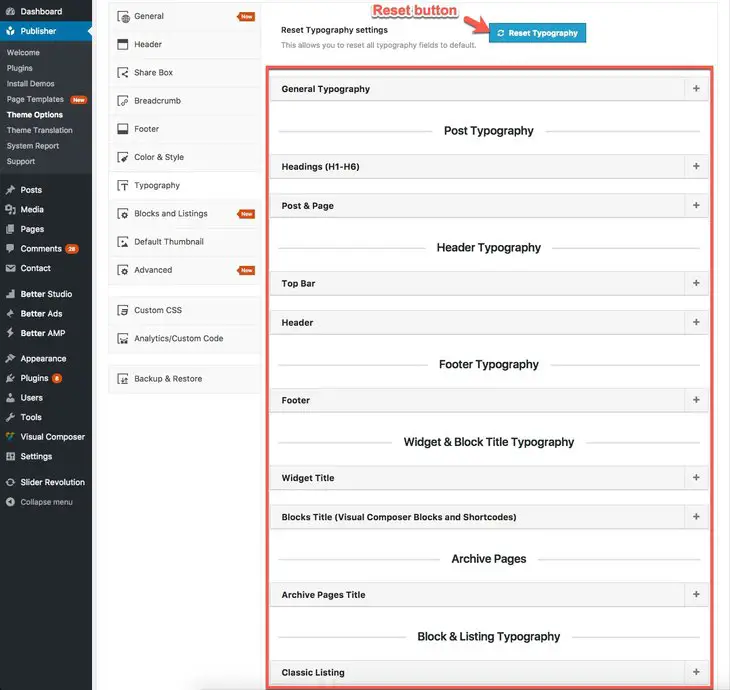
There is a button labeled Reset Typography. By clicking it, all typography settings will reset to theme defaults.
As you see in above image, every part of Publisher has its own typography. Click on + to open accordion menu for every part and make your changes. Options for every accordion are nearly the same. Here we describe what these options mean also describe how to add and use custom fonts.
For example click on General Typography. You see it has some subsections: Base Font(body), Posts Meta, etc. and every subsection has its own sections: paragraph, heading, divided. But options are the same, just select which part of theme you want to change. Paragraph is ordinary text, Heading means H1 to H6 tags, and Divided stands for separated characters. We select General Typography → Base Font (Body) → Heading.
What are Typography Options?
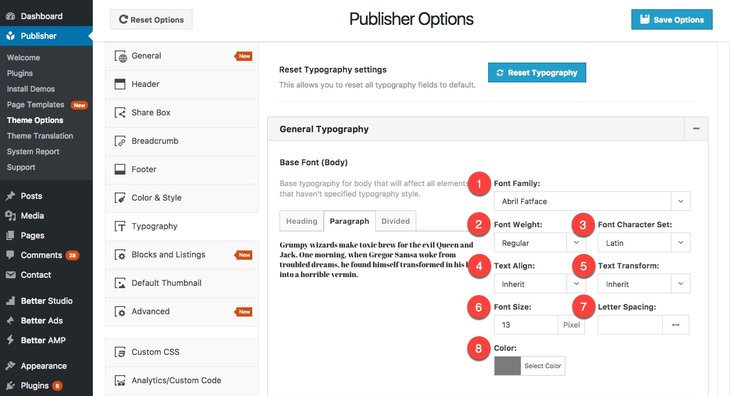
1- Font Family: Select a font between nearly 1000 pre-install fonts in Publisher which you can add new fonts to it (later in this article). Publisher supports Google Fonts, Google early Access Fonts, Font Stacks, Webkit also you can add Custom Fonts.
2- Font Weight: The font-weight property sets how thick or thin characters in text should be displayed.
3- Font Character Set: All fonts use a character set. A character set contains punctuation marks, numerals, uppercase and lowercase letters, and all other printable characters. Select this option according to your website language.
4- Text Align: The text-align property specifies the horizontal alignment of text in an element.
5- Text Transform: This property in CSS controls text case and capitalization. For example select Capitalize to capitalize first letter of each word.
6- Font Size: The font-size property sets the size of a font.
7- Letter Spacing: This property increases or decreases the space between characters in a text.
8- Color: Specifies the color of font.
How to Add a Custom Font?
As soon as you add a custom font, it will add to font family list. There are two ways to add custom font to Publisher.
Add New Custom Font in Typography
First way is adding it in typography. Follow steps below:
1- Click drop down menu to select Font Family.
2- Select Upload Custom Font.
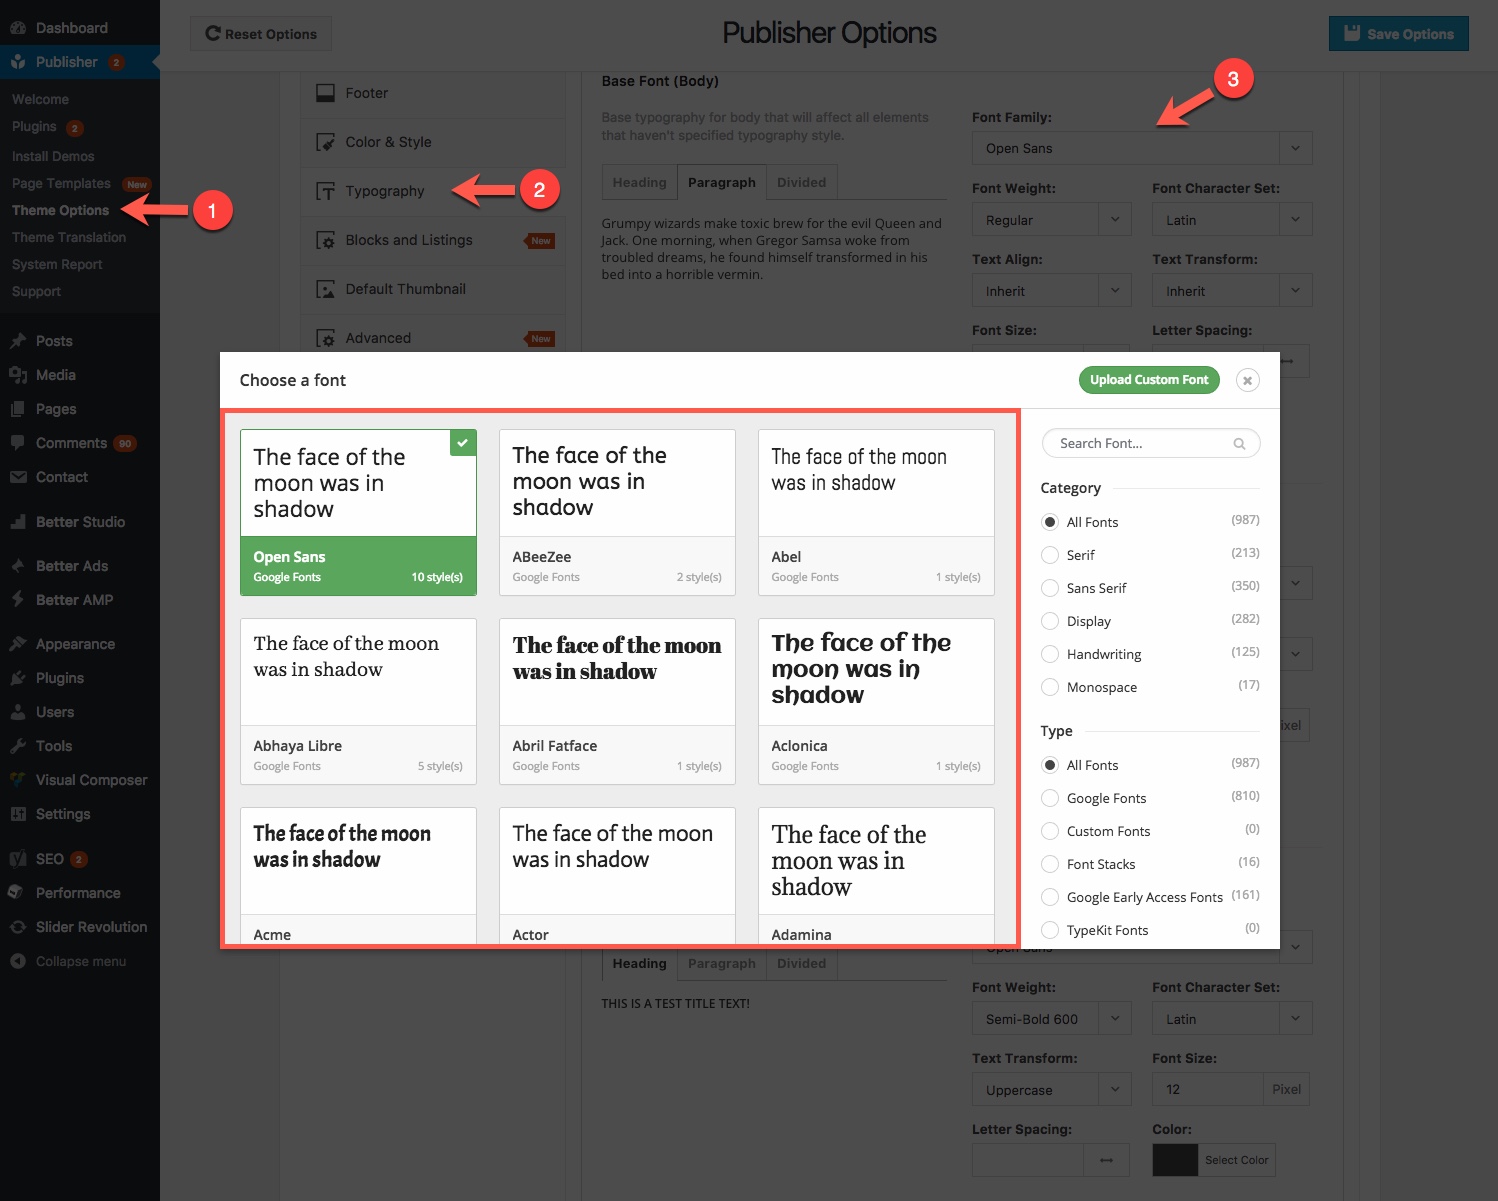
3- Here Select a name for new font. Now select font files in each field according to their format. Different browsers support different formats.

4- Finally click ADD CUSTOM FONT.
Add New Custom Font in Font Manager
Second way is adding through Font Manager. In theme panel go to Better Studio → Font Manager.
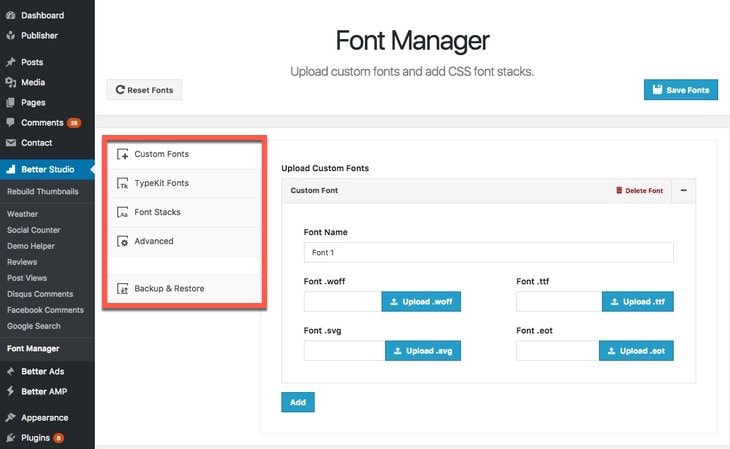
As you see in above image there are several tabs in Font Manager and we are going to describe them one by one.
Custom Fonts
This is exactly the same as Add New Custom Font in Typography described above.
Type Kit Fonts
TypeKit offer a service that allows you to select from a range of hundreds of high quality fonts for your WordPress website. The fonts are applied using the font-face standard, so they are standards compliant, fully licensed and accessible.
1- Go To typekit.com and register for an account
2- Choose a few fonts to add to your account and Publish them. Of course there are paid plans for more fonts and websites.
3- Go to the Kit Editor and get your Embed Code (link at the top right of the screen)
4- Copy the whole 2 lines of your embed code into the following TypeKit Embed Code field.
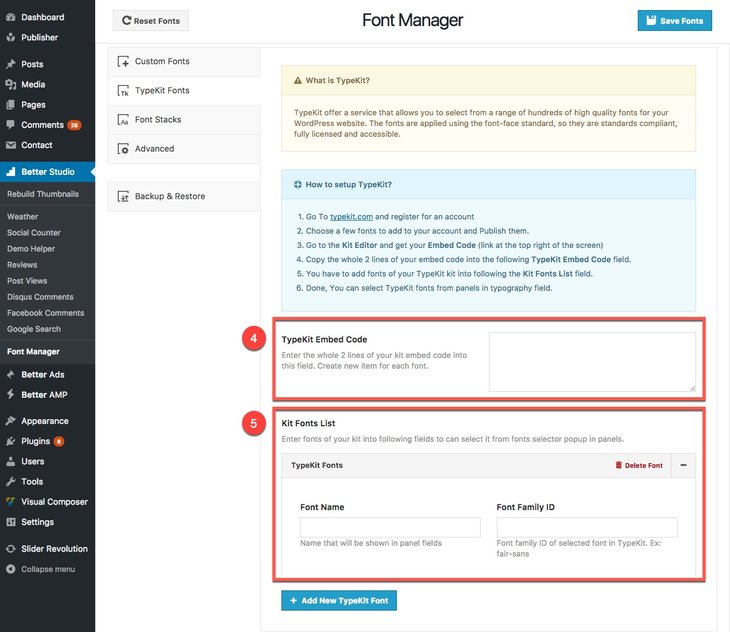
5- You have to add fonts of your TypeKit kit into following the Kit Fonts List field (see above image).
6- Click Add New TypeKit Font. Done, You can select TypeKit fonts from panels in typography field.
Font Stacks
Web safe fonts are fonts that are pre-installed by many operating systems. While not all systems have the same fonts installed, you can use a web safe font stack to choose several fonts that look similar, and are installed on the various systems that you want to support.
You can simply add new font stack as following steps.
1- At the bottom of the page click on Add New Font Stack.
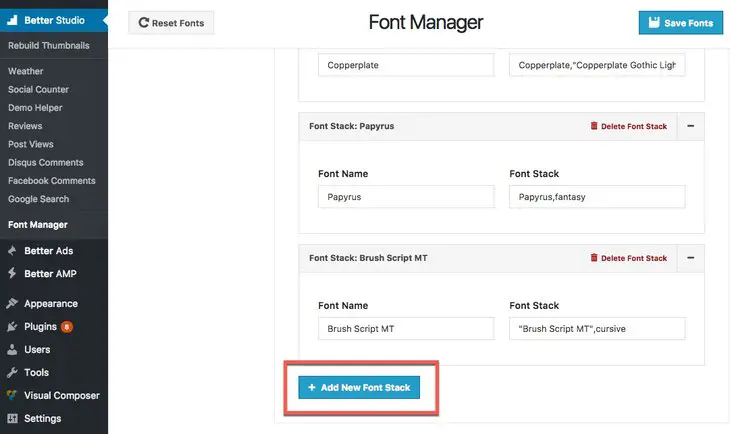
2- New Font Stack will be added. Write main font name in Font Name, and write similar fonts name in Font Stack.
If the name of a font family is more than one word, it must be in quotation marks, like: “Times New Roman”.
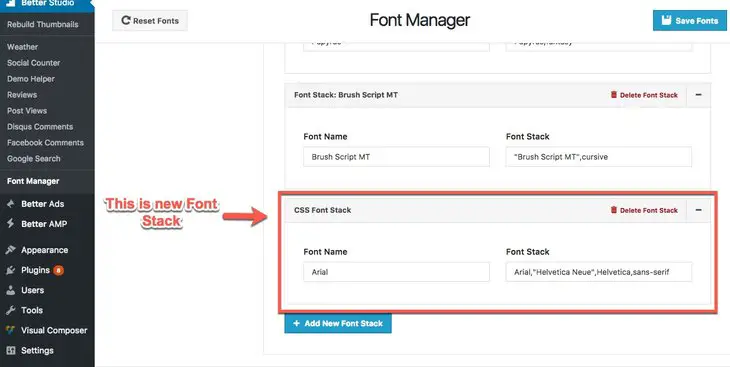
It’s done and you can select new Font Stack as font-family in Typography.
Advanced
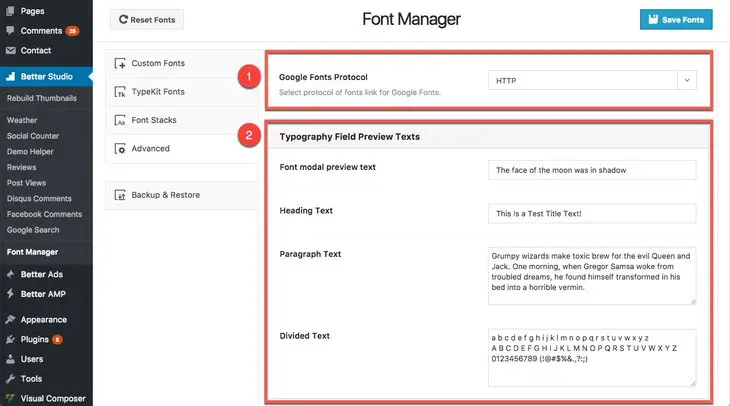
1- Select which protocol you want to use for Google Fonts. If your website uses SSL, set Google Fonts protocol to HTTPS.
2- These are sample texts displaying in Typography. When you are using a language other than English, change it to your website language so you can see how your typography settings look like.
Backup & Restore
Here you can Export/Import a backup of your current translation.