
We talked about benefits of cache plugins before now we are going to talk about proper setup of WP Rocket plugin or briefly Rocket.
Go to Settings → WP Rocket, here are WP Rocket options.
1- Basic
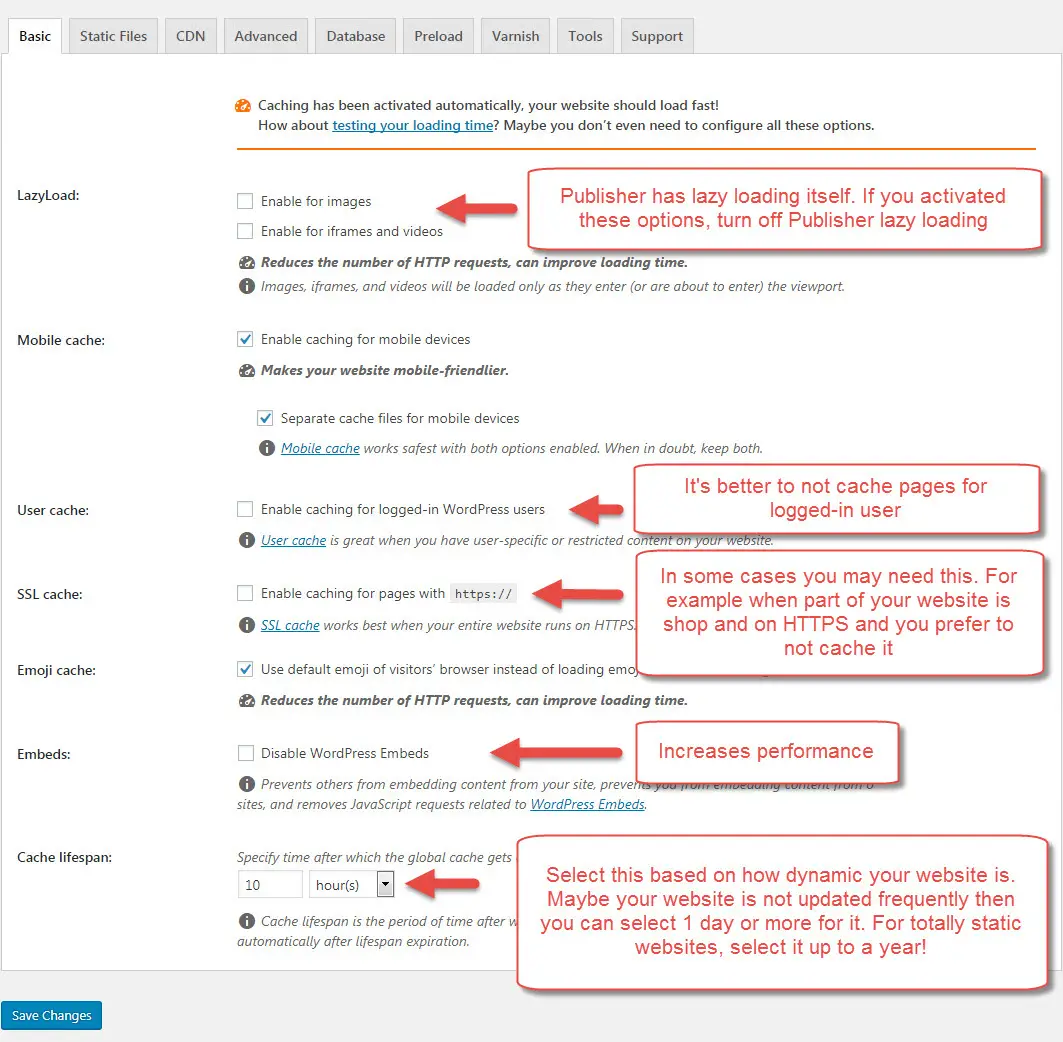
Lazyload: It defers images, videos and iframes loading. Huge impact on loading time. Publisher has lazy loading itself. Use one of them to avoid conflict.
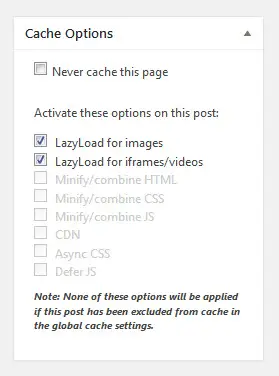
Also in every post you can find a metabox which you can disable these options (and some other options) for every single post/page.
 Mobile Cache: If you use a plugin for creating a separate theme for mobile, activating this option might lead to a mess.
User Cache: Logged in user cache is useful when you have a membership site, or similar when users must log in to see content. Read user cache on Rocket doc if you are using a plugin for login/logout in WordPress.
SSL Cache: Enable it if using SSL. Sometimes you might have SSL and non-SSL content. This gives you the ability to turn off cache for SSL pages.
Emoji Cache: Every tiny emoji sends a HTTP request and take time to load from WordPress server. Cache them for avoiding this delay.
Embeds: Prevents other sites from embedding your content on their website. This is useful for preserving bandwidth and your content owning.
Cache Lifespan: Select a period for refreshing cache. If you do not update website content frequently, select a large period.
2- Static Files
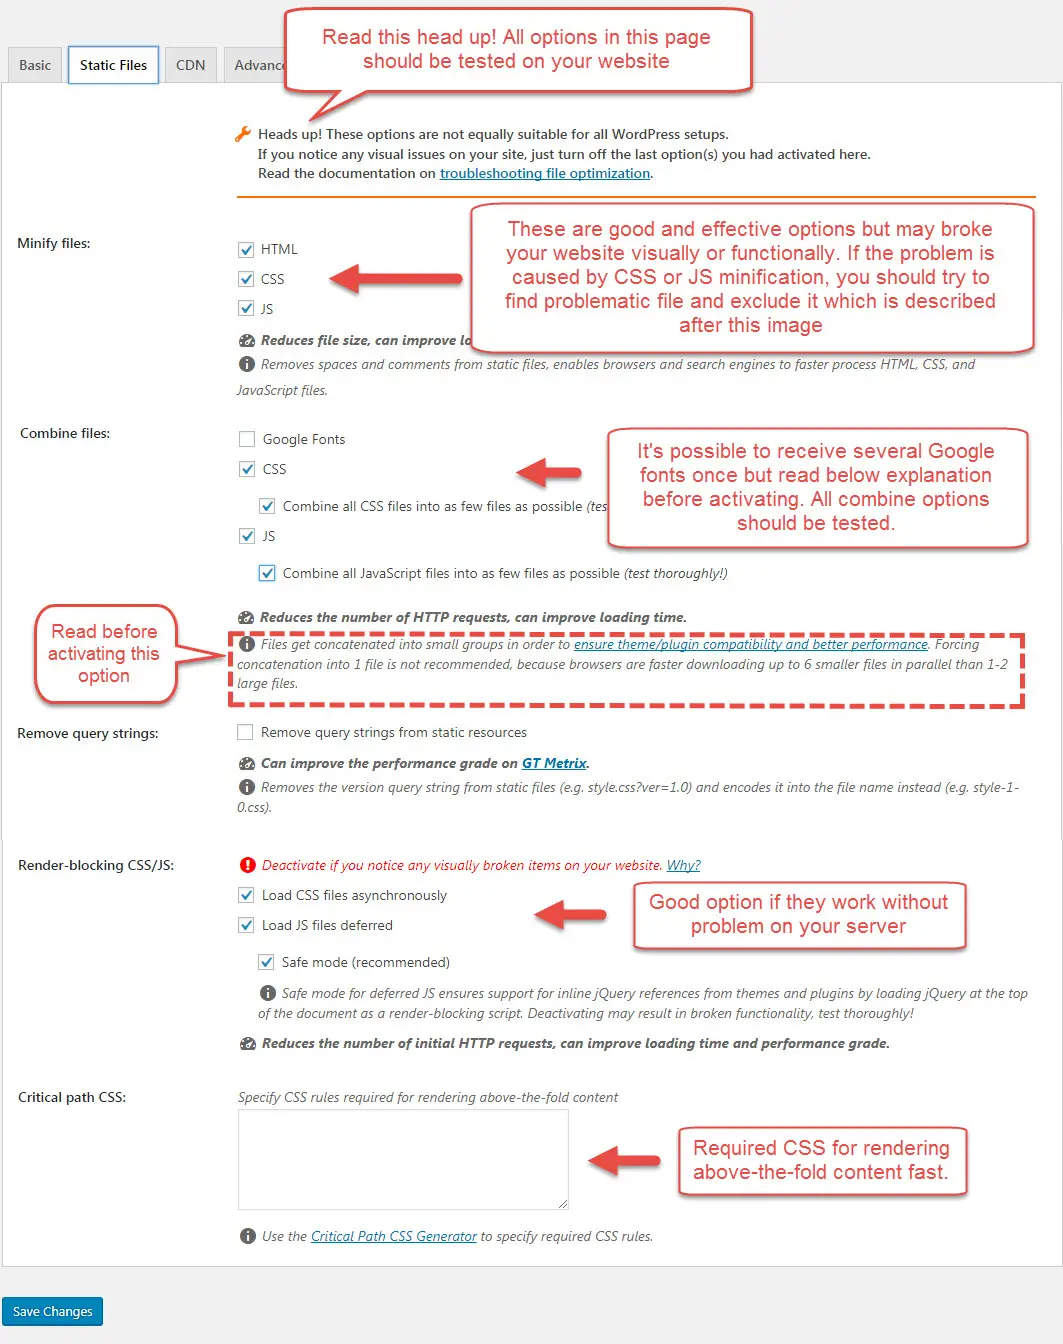
Options in this page should be tested on your website. There is no guarantee they work fine on your server configurations.
Minify Files: Reduce size of files. If you enable these, you can find options in every single post/page for disabling.
It’s a frequent problem that one or some files have problem with minification. In this case, you should find problematic files and exclude them from minification. You can read this thread about Find the right JS files to exclude from minification or just exclude all files from minificarion then include them one by one. If you choose the last, after including every file, refresh your page (purge cache plugin and browser cache first) to see if the problem is back. If it’s back, this file is problematic and must be excluded; if no problem, there is no need for excluding this file. File excluding is in Advanced tab.
Also the problem might happen with CSS files. The procedure is the same as JS file; exclude all files and find the problematic ones by trial and error.
Combine Files: Test it on your website.
Remove query strings: Remove query strings from static files is usually mentioned in GTmetrix.
Render-blocking CSS/JS: Good options if they work fine.
Critical path CSS: This loads your page without CSS and use codes you wrote in this box. This increases on screen load speed. For using this feature, read Render-blocking Javascript and CSS.
3- CDN
Read Use CDN for more information about CDN. WP Rocket is generally compatible with most CDN providers, including Amazon Cloudfront, MaxCDN, KeyCDN and others.
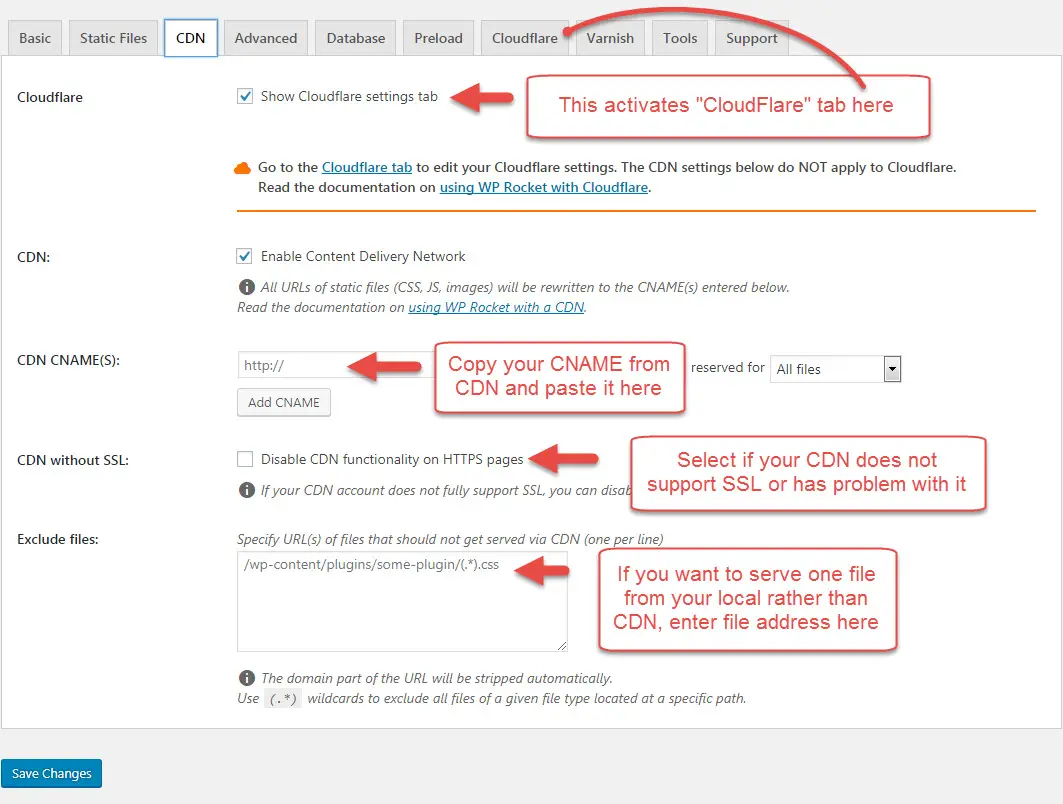 CloudFlare: This is needed only when you use CloudFlare CDN. By checking this option, another tab will be added to plugin options.
CDN: Enable CDN mode in WP-Rucket plugin.
CDN CNAME(S): Copy this from CDN account after its setup. WP Rocket will rewrite all URLs for your assets (static files) that are added using WordPress functions, for example post thumbnails, stylesheets and the like with this CNAME (domain) address. For different file types you can add different CNAMEs. For this purpose click on Add CNAME add new address and select which files should be loaded from this address in “reserved for” drop down. Please notice activating this option does not mean WP_Rocket “Push”s all the content in your CDN. If you have problem with this, please read Using WP Rocket with a CDN.
CDN without SSL: If your website is SSL enabled, CDN files should be served via HTTPS. Otherwise browsers do not load the website and show security alert.
Exclude files: If you have a file and don’t want to serve it from CDN servers for some reason, add file address in there.
Advanced
These settings are for advanced cache management and normally you don’t need to change these. Read proper guidance in below image.
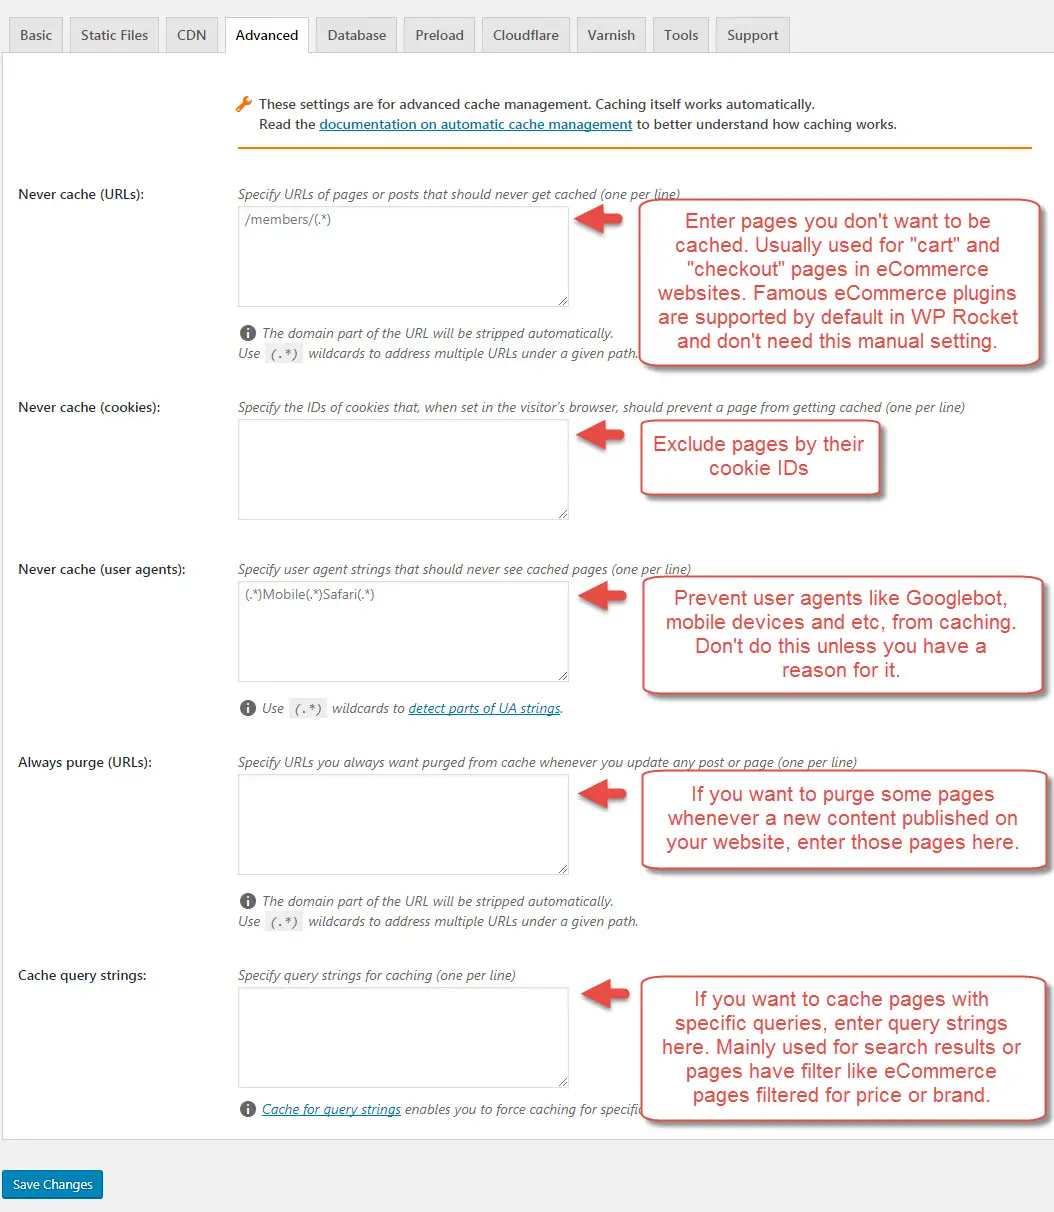 Never cache (URLs): Usually used for “Cart” and “Checkout” pages in shops. But remember famous eCommerce plugins are supported by default in WPRocket. Just use it if you see these pages are being cached.
Database
Read Optimizing Database for more information about database optimization in WordPress. WPRocket can handle database optimization but do not forget to create a backup of your database, if something got deleted by mistake, it cannot be undone.
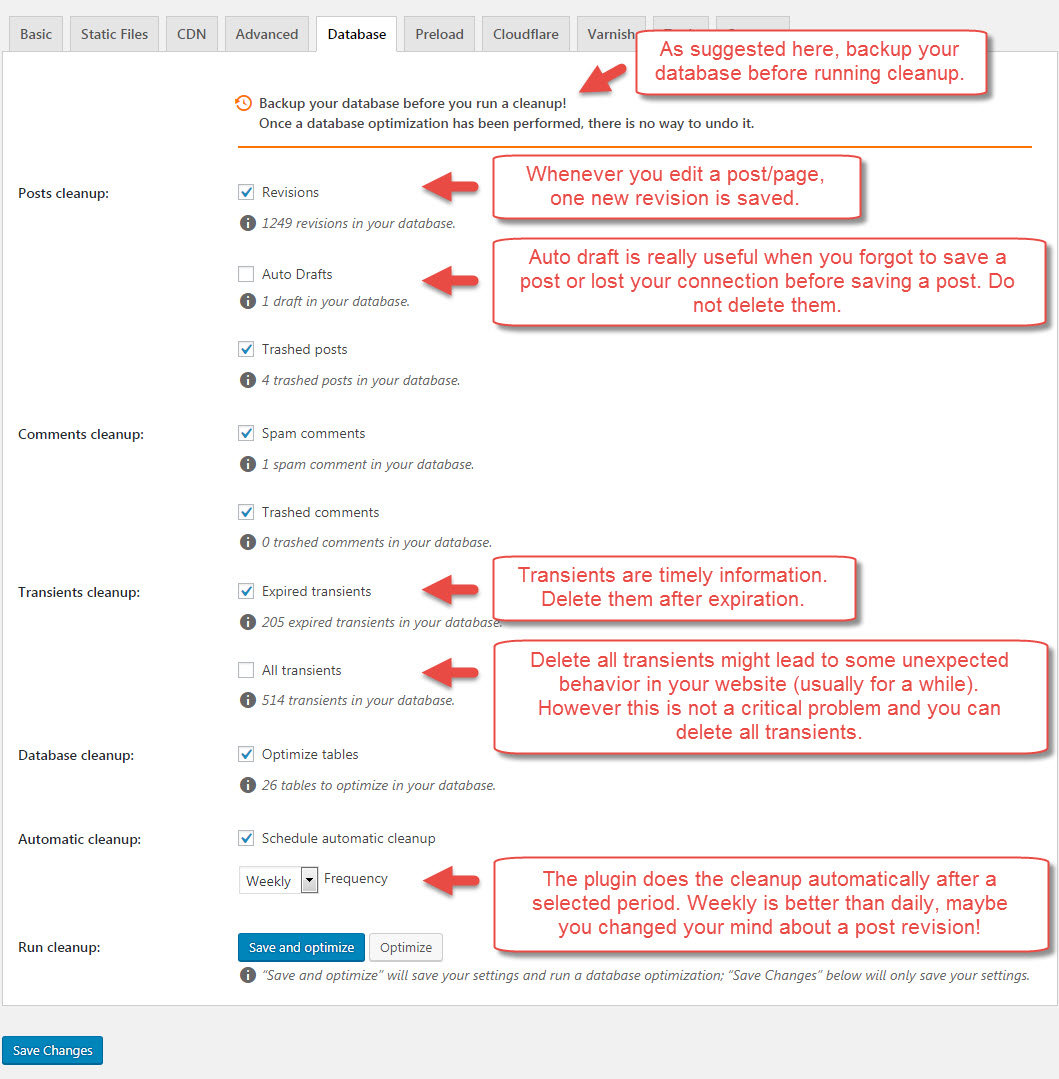 Be cautious about activating above options. For example, you may send a post to “Trash” and do not want to delete it completely but it will be deleted by the plugin in this page or if Automatic Cleanup is activated.
Preload
In simple words, “Preload” will renew all links in website “sitemap” after that the “cache lifespan” expires (lifespan discussed in Basic tab). So first of all the website need a “sitemap”. WPRocket automatically detects sitemap of some famous plugins. If you do not activate this option, after lifespan expiration only the front page and the page links found on it will be cached.
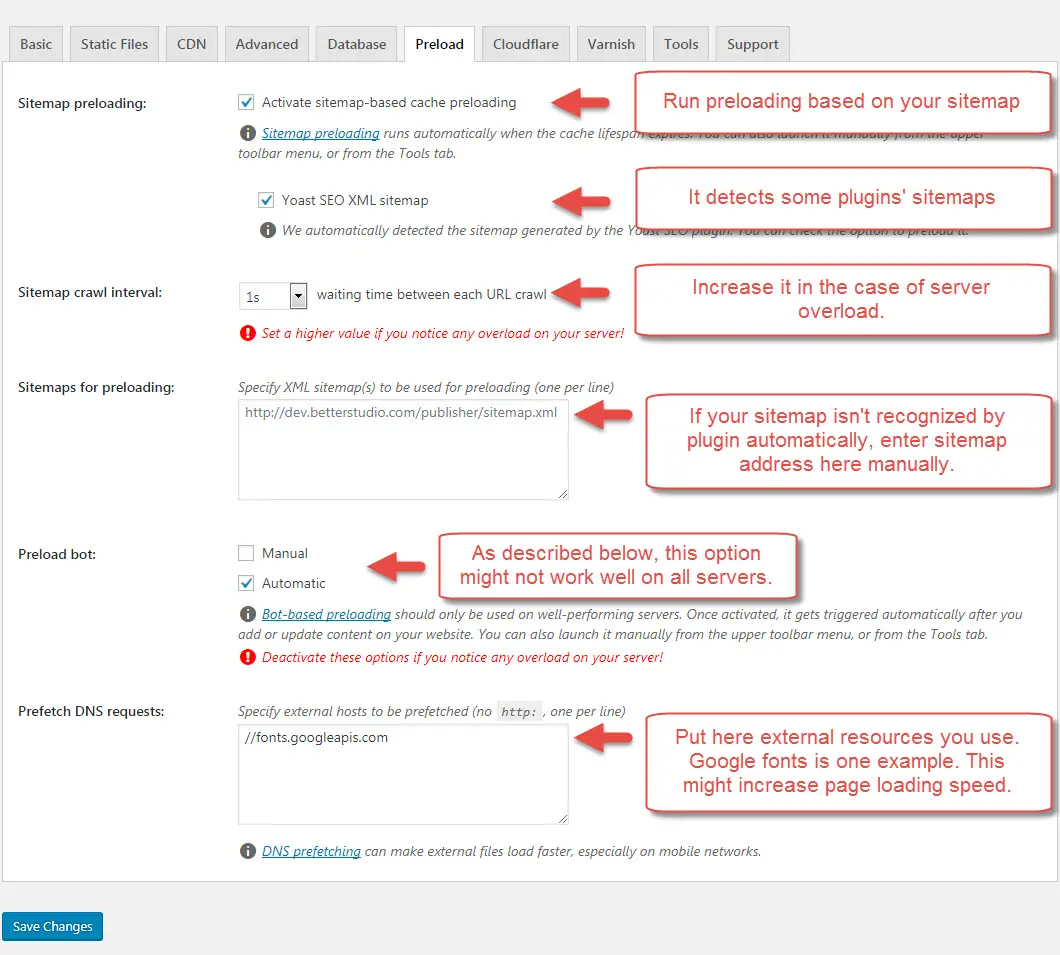 Sitemap crawl interval: If you find out the server is overloaded at the time of preloading, increase this interval. In weak servers or very big websites, maybe it is better to ignore preload feature because of high CPU usage. Test it in your case.
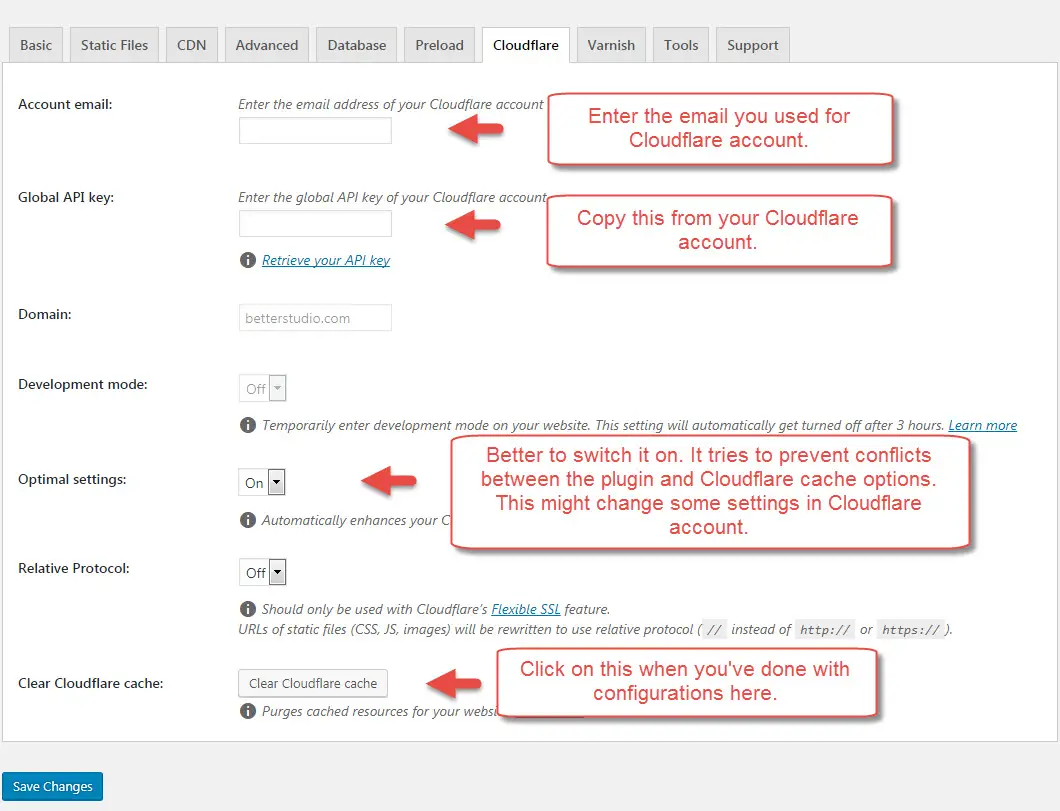
CloudFlare
Only useful when you use CloudFlare CDN. Also “CloudFlare” option should be checked in “CDN” tab.
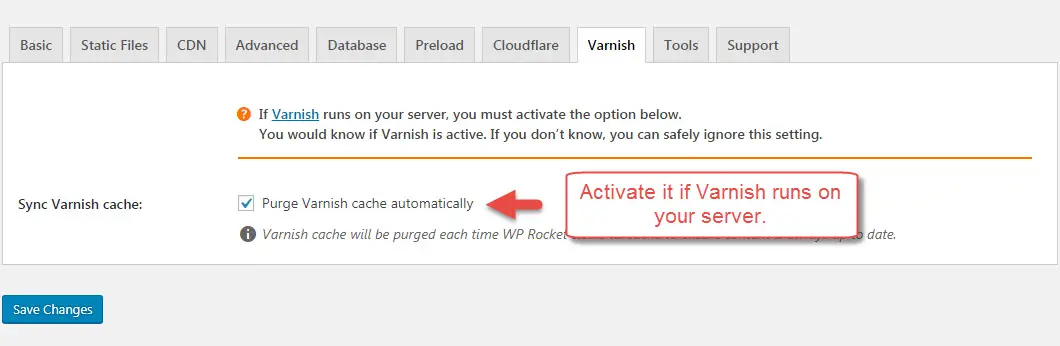
 Varnish
Activate Sync Varnish cache if Varnish cache is activated on your server. If you are not sure about Varnish on your server, check “add-on”s on your server or finally ask host server support about it. By enabling this option, WP Rocket will make sure the Varnish cache is purged whenever the WP Rocket cache is purged.
 Tools
Tools
When you change/edit a file on your server (even changes in database, based on how you did changes), the cache plugin probably does not understand it, so the caches should be purged and re-cached to encounter recent changes. In Tools you can find whatever you need for this purpose also backup options.
 Support
There you can find documentation link of WPRocket and also create support ticket directly in the plugin.
